•
11-minute read


SEO PowerSuite tools are very customizable. Perhaps too customizable. Most workspaces have advanced settings, but there are also data sources to choose from, integrations, project preferences, and global preferences, among many other smaller tweaks and tricks. So there is a very good chance that, hard as you tried, you have totally missed at least a couple of handy settings.
In this post, I will go over some of the lesser-known SEO PowerSuite features, complete with detailed instructions and real-life use cases. The features have been collected by asking our users and consulting our support team, so those are legitimately useful tips coming from actual applications:
All four SEO PowerSuite tools can be set up to run tasks automatically. The types of tasks differ from tool to tool, but the functions are mostly similar — update data and deliver reports.
When you update project data manually, it is likely to happen at random time intervals, basically whenever the need arises. This is inconvenient for two reasons.
Reason one — projects can take a while to update. Depending on the size of the project and the complexity of the task, updating your data can take between a couple of minutes and a couple of hours. Which is definitely frustrating if you need your data right now. With automation, you can set your project to be updated regularly, say, on Sunday, and have your data ready by the time you are in the office on Monday. Or you can set your project to be updated daily and have fresh data available at all times.
Reason two — inconsistent updates lead to inconsistent data. When you update your project at irregular intervals you get random data points. And if you skip a large period of time then the chunk of data will be permanently missing. Say, a large drop happens in this time period — there will be no way to pinpoint the problem.
Whichever tool you use, go to Preferences > Scheduled Tasks & Alerts and click Add:
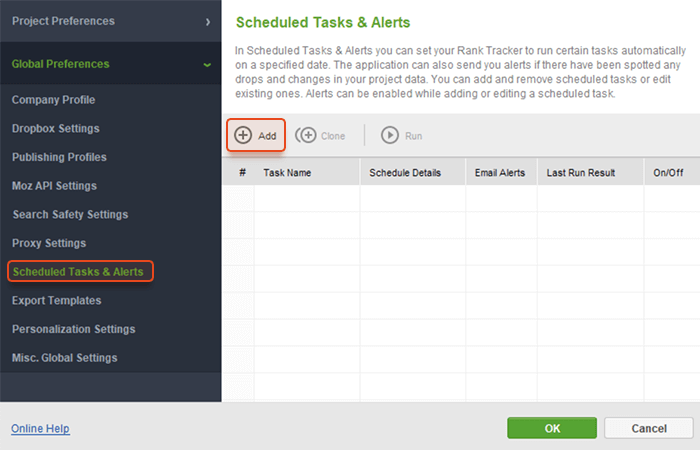
From then on, follow the instructions in the dialogue box, they will take you through the types of tasks, choice of projects, schedule options, and email alert options.
For a step-by-step guide, please consult SEO PowerSuite help documentation.
Email alerts are an optional setting in task automation. Basically, whenever certain conditions are triggered, you get a corresponding notification in your mailbox.
The main convenience of alerts is that you don’t have to worry about missing any important developments. A significant drop in rankings? Too many links gained or lost? Technical issues discovered on your website? You will get a notification right away. No need to run manual checks and waste time staring at your data.
Whichever tool you use, go to Preferences > Scheduled Tasks & Alerts, and click Add to create a new automated task. Follow the instructions until you get to the step called Alert Settings:
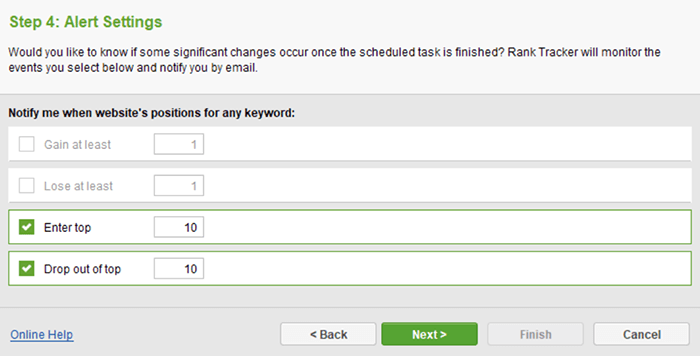
There, you can select the exact conditions which will trigger an email alert, as well as add one or more email addresses to send alerts to. The example above is from Rank Tracker and the setting is to notify you whenever a keyword enters or drops out of page one of the search results. Each tool and each type of automated task has its own set of triggers.
For a step-by-step guide, please consult SEO PowerSuite help documentation.
All four tools allow creating short notes to mark important project-related events.
Have you run an experiment? Moved your website? Did a major redesign? Create a note in your project so that you can always look back and see whether the event has triggered any significant changes in your performance:

The events will appear on your graphs as dashed lines. Black lines are major Google algorithm updates — those are added by our team. Green lines are the events added by you. Hover over any line and see the event description and the date.
Whichever tool you use, go to Preferences > Events and click Add to create a new event:
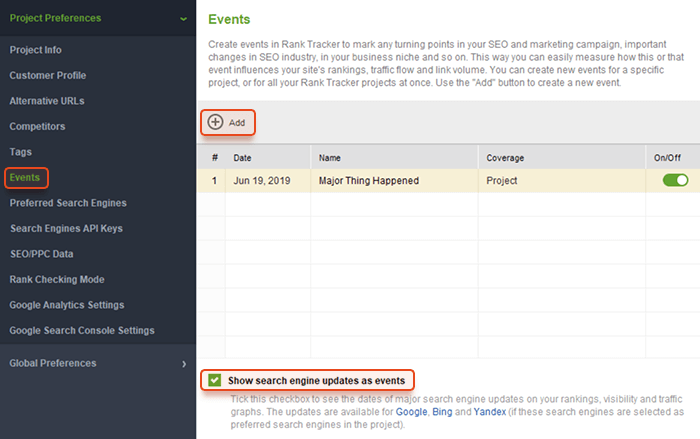
Note that at the bottom of the dialogue box there is an option to turn off the events reflecting major Google algorithm updates — in case you find them to be too distracting.
For a step-by-step guide, please consult SEO PowerSuite help documentation.
All four tools allow using tags to narrow down the selection of data for your reports.
Some reports may run incredibly long. Say, if you are tracking thousands of keywords in Rank Tracker, then your report will be hundreds of pages long, which is not always practical. One way to make these reports shorter is to limit the selection of data. This is where tags come in — assign them to the data you want to use, and then edit the report using tagged data only.
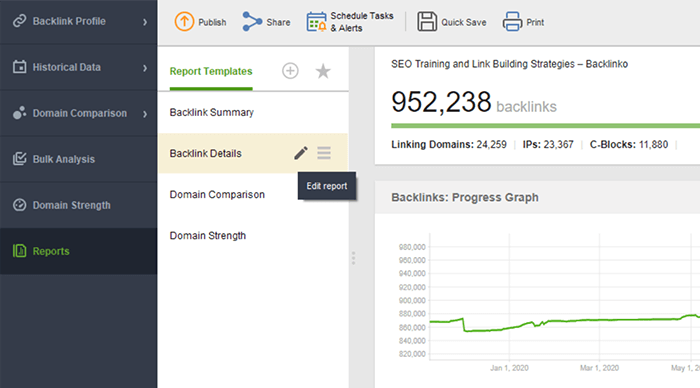
In the Reports tab, hover over the report you want to adjust and click Edit report:
Then, click the cogwheel in the top right corner:
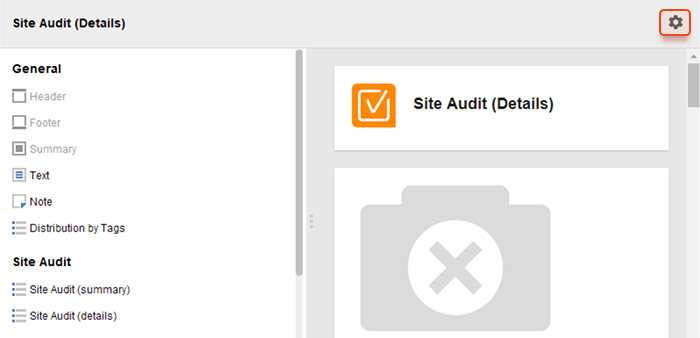
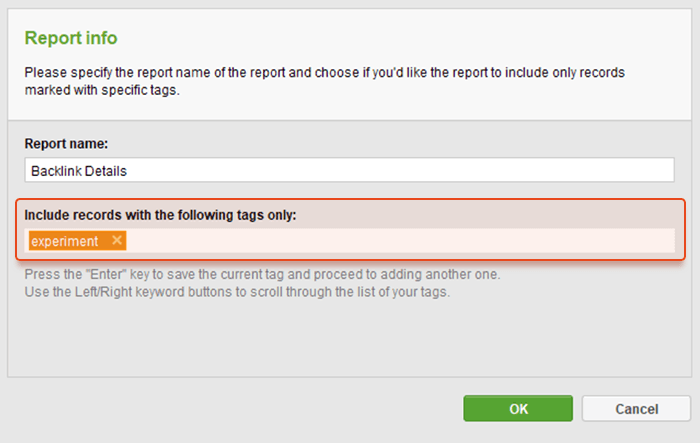
Finally, add any number of tags matching the data you want to be used in your report:
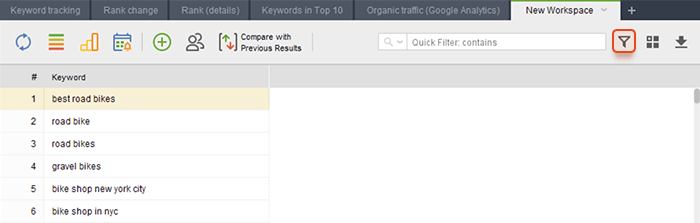
All tools that have dashboards with workspaces let you add new custom workspaces.
Say you are tracking thousands of keywords in Rank Tracker. Now, if you wanted to view a specific subset of data, like which keywords are in top 10, or what’s up with your competitors, or how are you doing in each state, you’d have to use filters and column settings to reconfigure your entire workspace. Mighty pain in the ass. Why not just create a separate workspace, configure it any way you like, and keep it one click away?
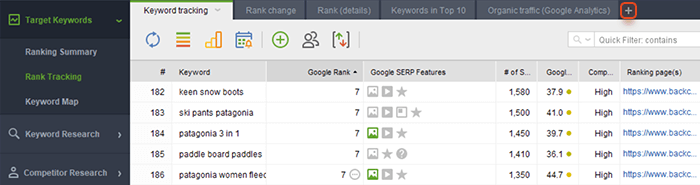
Wherever there are workspaces, click the “+” button to add a new one:
Choose which columns you want to be shown:
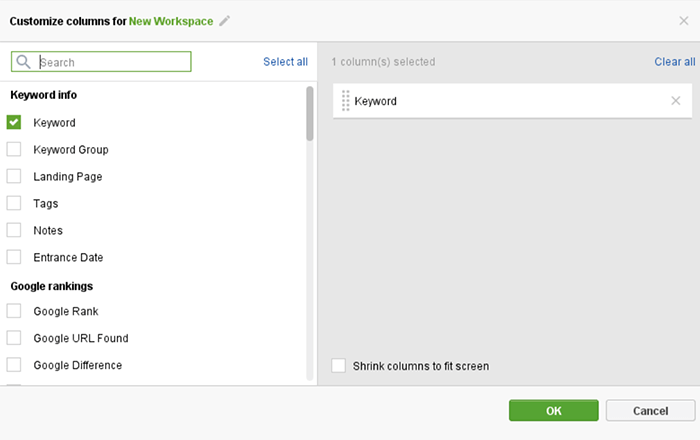
Finally, use filters to set up custom conditions for displaying your data:
Rank Tracker allows tracking your performance in any given location.
If your operations are limited to a specific geographic area (state, city, part of the city), then there is no point in tracking wider search results. Focus on the exact SERPs viewed by your target audience in your target location. This is where your true competitors are, this is what you should benchmark against.
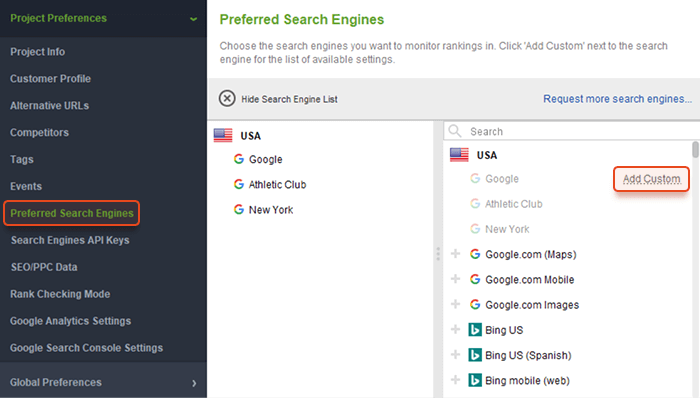
In Rank Tracker, go to Preferences > Preferred Search Engines and click Add Custom to add a specific location:
In the dialogue box, scroll down to Preferred Location and enter any location you’d like to track, down to a street or even a building:
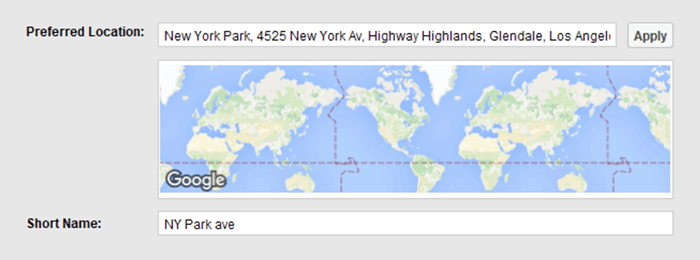
Once your custom location is saved, you will be able to add it to your workspace and track your rankings as if searched from the area. You can also add multiple custom locations and track your performance street by street or city by city.
For a step-by-step guide, please consult SEO PowerSuite help documentation.
Rank Tracker allows tracking keyword performance of up to 10 other websites.
SEO is all about competition and if you want to succeed you have to collect intel on your competitors. This feature allows you to keep tabs on your competitors’ ranking, so the minute they make a move — you will know. Notice them climb the SERPs? It’s time to visit their pages and see what’s been driving their growth.
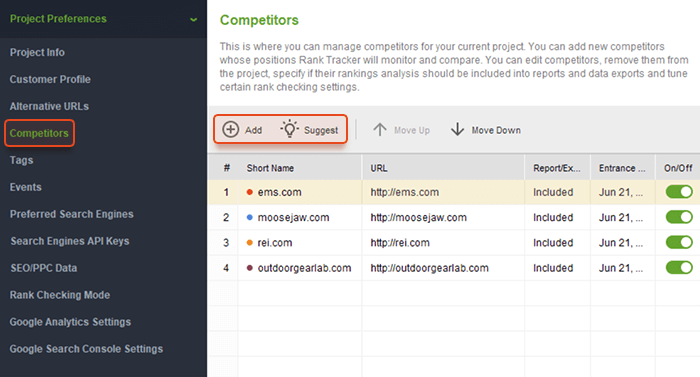
In Rank Tracker, go to Preference > Competitors click either Add to enter competitors manually or Suggest to find competitors based on your keywords:
Add a few of your seed keywords:
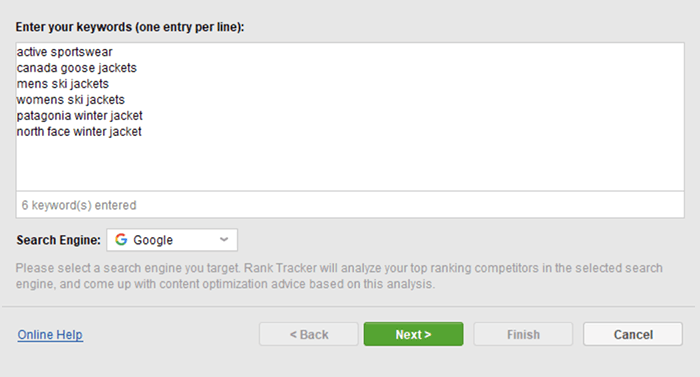
Finally, choose which of the suggestions you would like to use in your project:

Once your competitors are chosen, you can add them to your keyword tracking workspace and view your rankings side by side.
For a step-by-step guide, please consult SEO PowerSuite help documentation.
Rank Tracker allows tracking more than one page per keyword.
Sometimes, through poor optimization or pure randomness, a few of your pages will be ranking for the same keyword. It is not exactly a problem, but it could be a sign that one of those pages is not distinct enough to rank for its own keyword, so perhaps some semantic optimization is in order. Rank Tracker allows you to switch from tracking one page per keyword (default) to tracking multiple pages per keyword — this way you can detect and fix keyword cannibalization.
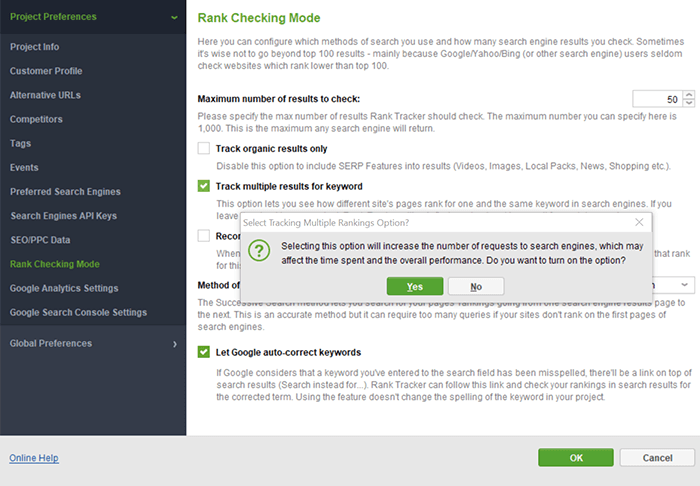
In Rank Tracker, go to Preferences > Rank Checking Mode and activate the option to Track multiple results for keyword:
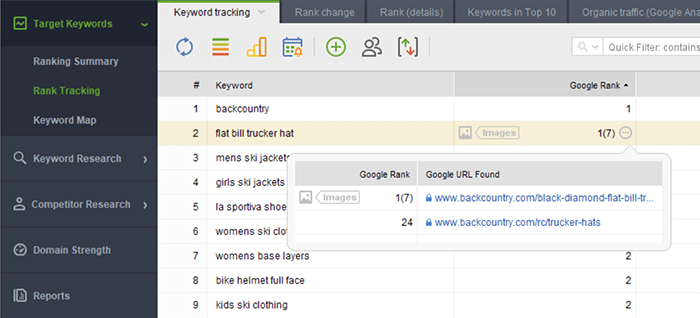
Once the option is activated, refresh your rankings and you will see a three-dotted button next to cannibalized keywords. Click the button and you will see a list of pages ranking for the keyword as well as their individual ranks:
For a step-by-step guide, please consult SEO PowerSuite help documentation.
Rank Tracker’s sandbox is where all of your discovered keywords are stored. One way to organize these keywords is to group them by semantic similarity.
Gone are the times when we had to create a separate page for even the slightest keyword variation. Today, one page is enough to cover an entire set of similar keywords. The semantic grouping feature allows you to assemble the sets of semantically similar keywords, which makes it super easy to see which pages to create and which keyword variations to include.
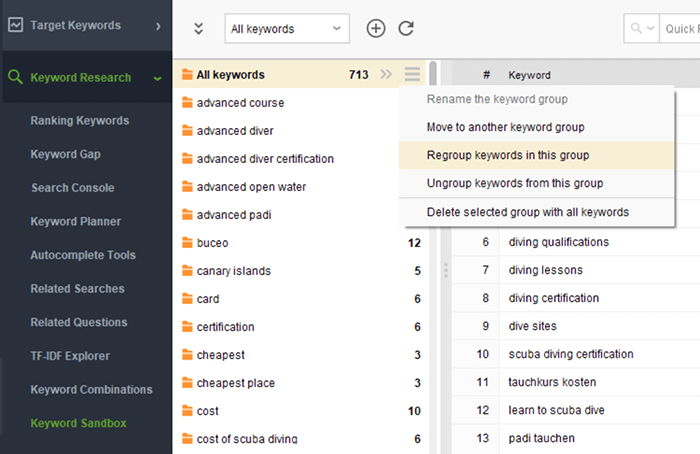
In Rank Tracker, go to Keyword Research > Keyword Sandbox, hover over All keywords, click the sandwich icon to manage the group, and choose to Regroup keywords in this group:
In the dialogue box, you will be offered to choose between Low, Medium, and High degrees of semantic similarity. Select high similarity to create bigger groups (see which category pages to create for your website) and low similarity to create smaller groups (individual pages).
You can tell WebSite Auditor to exclude all dynamic URLs from the audit report.
When auditing a website, you might be overwhelmed with the abundance of dynamic URLs. They are an inconvenience at best. At worst, there might be so many that they will push the tool beyond its auditing capacity. Best thing to do is to tell WebSite Auditor to ignore dynamic URLs altogether.
In WebSite Auditor, go to Preferences > Crawler Settings and choose URL Parameters:
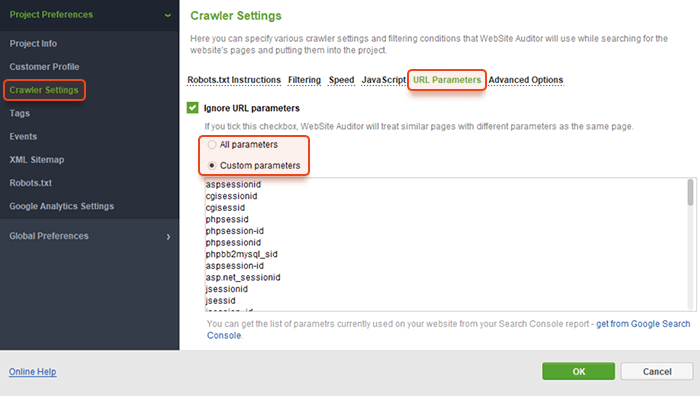
Choose to Ignore All parameters if you want all similar pages with different parameters to be treated as the same page. Choose to Ignore Custom parameters to handpick the parameters that should be ignored.
For a step-by-step guide, please consult SEO PowerSuite help documentation.
WebSite Auditor allows searching your website for any pieces of text or code.
This neat little feature has got more applications than I can possibly cover here. It can do everything from looking up keywords, to verifying tracking tags, hreflang links, and structured data, to scraping websites for contact details. If you are interested in a full list of custom search applications, check out this article on popular use cases.
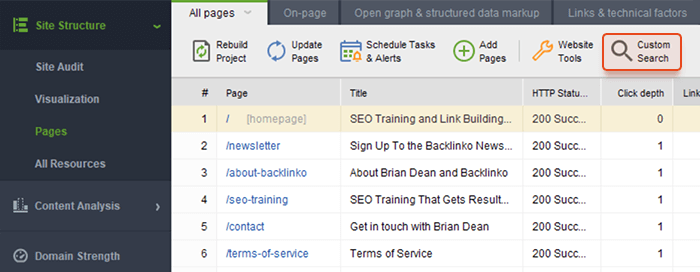
In WebSite Auditor’s workspace, click on Custom Search:
In the dialogue box, choose whether you want to run a search by pieces of text (contains, does not contain) or by pieces of code (CSS selector), and click Search:
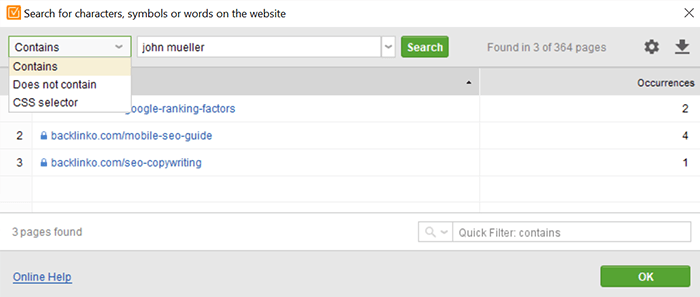
The tool will return a list of pages that fit your search parameters.
For detailed instructions, check out SEO PowerSuite help documentation.
SEO SpyGlass allows users to request the verification of cataloged backlinks.
Whenever you are researching backlinks with SEO SpyGlass, the tool goes to our backlink index to look them up (digital agencies, developers, and data scientists can make use of our backlink API). The index is this large beast that crawls the web looking for new backlinks and checking whether the old ones are still there. It is not exactly slow, but it is so big that it takes a while to update all of its data. As a result, some of your backlinks are a little outdated and some are not yet discovered.
There is nothing we can do about finding new backlinks, the index just has to do its thing. But there is something we can do about updating already discovered backlinks — submit a verification request. This feature activates a separate crawler that goes through known sources of your backlinks and checks their current status.
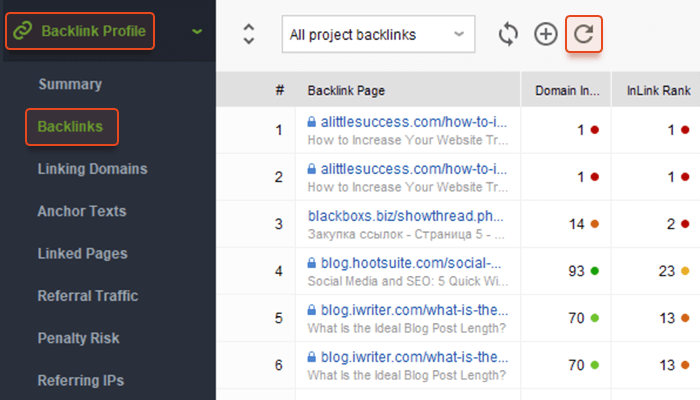
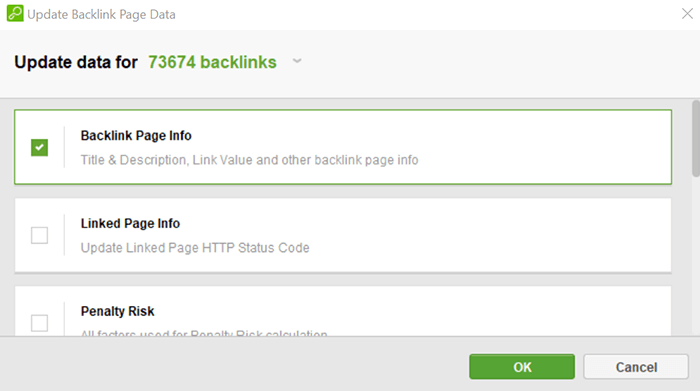
In SEO SpyGlass, go to Backlink Profile > Backlinks and click the refresh button:
In the dialogue box, only check the Backlink Page Info option and click OK:
Once the verification is complete, you will be able to see the current status of your backlinks in the Links Back column of your dashboard.
For a step-by-step guide, please consult SEO PowerSuite help documentation.
So, how many of these did you know? I hope these features will come in handy when working on your projects — some of them are major time savers. Let me know if I have missed any of the other curious features and I’ll be sure to add them to the list.
| Linking websites | N/A |
| Backlinks | N/A |
| InLink Rank | N/A |